I do live under a rock at times and it really suits me. I tend to catch on to a ‘trend’ well after it was a trending. This is the perfect example of this. I’m at least two if not more years out on this one. However, no matter the gap in time, it still remains delicious.
There are 2 versions of the flattened croissant, using an already baked croissant or using croissant dough. Ive made both and realised that the dough version comes out so much better!
With the baked croissant, you flatten it, which doesn’t really flatten it, then you cover it with a mixture of butter and sugar and cook it in a pan. The butter and sugar create like a hard caramel candy texture from being caramelised in the pan and mine came quite crunchy, which I didn’t enjoy.
I normally hate recipes that call for something thats already made, like a cake recipe that will cake for a box of cake mix. It’s understanding that not all regions in all countries will have the access or convenience of being able to use such items. However, I appreciate that making croissant dough from scratch is time consuming and can be costly, just for butter alone. If you want to make your croissant dough from scratch, don’t let me stop you!

Flat/ Candied croissant – this recipe easily serves 3-6, depending on the size of the croissant roll and how many you choose to eat.
Prep time: 10 mins
Cook time: 12-16 min depending on can instructions.
Ingredients:
- 1 Can of croissant rolls, choose the type that you prefer
- 1/2c (105g) Light brown sugar
- 1/2c (105g) Dark brown sugar (after you’ve made this recipe once and have tasted the difference between the different brown sugars, pick the one you prefer or continue to use both)
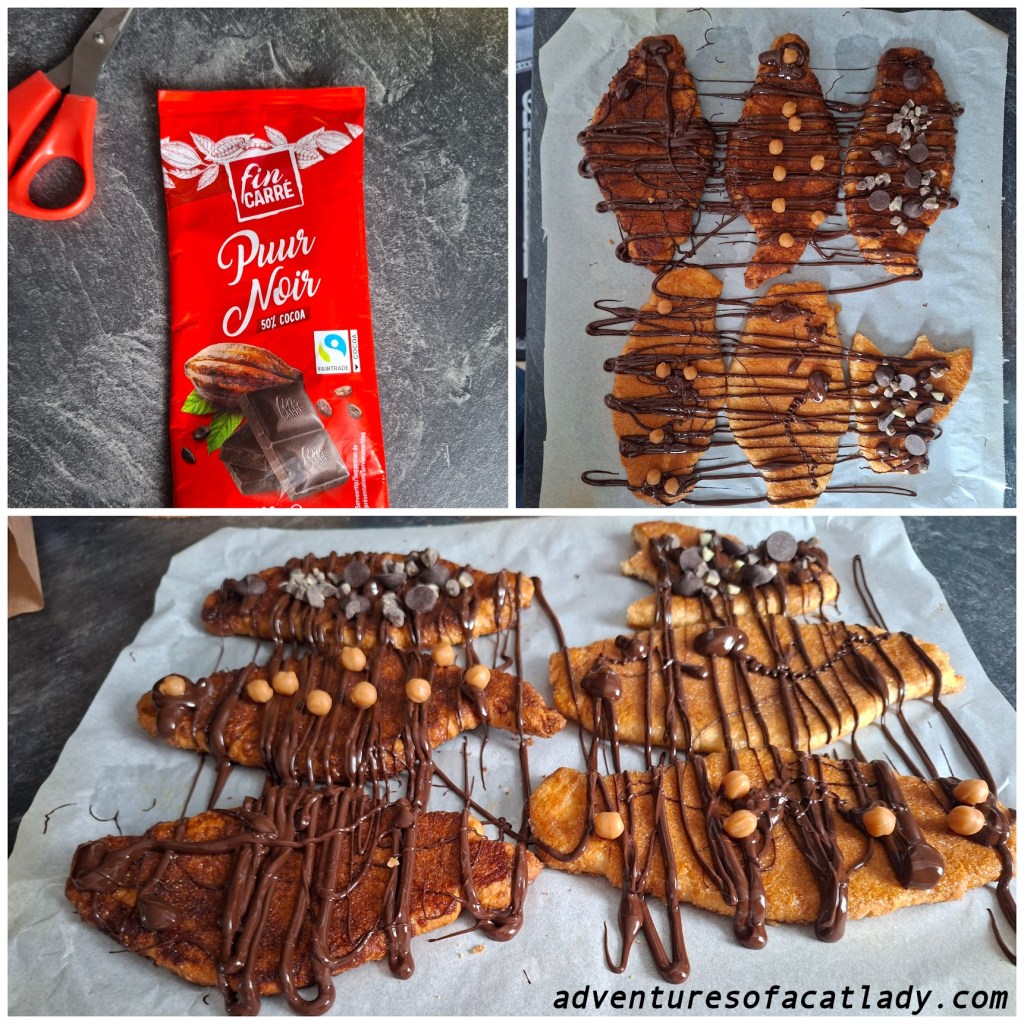
- 2/3c (100g) Chocolate of your choice, I used dark chocolate
- Toppings of your choice, I used Kraft Caramel Bits, Andres Andes Creme De Menthe Baking Chips, nuts, dried fruit, use whatever makes your heart happy
- Dash of cinnamon, purely optional but great for those who love cinnamon
Method:
- Before opening the can, please note the baking times, as once the can is open, going back to read things can be very difficult.
- Unroll your croissant dough. Roll each piece into the croissant shape, starting with the widest part and rolling towards the pointy tip.
- Flatten your croissant. I did this with a sheet of parchment/baking paper. Folded 1 sheet in half, unfolded it, then put the croissant in middle, of the first half, folded the paper over and used a rolling pin to flatten.
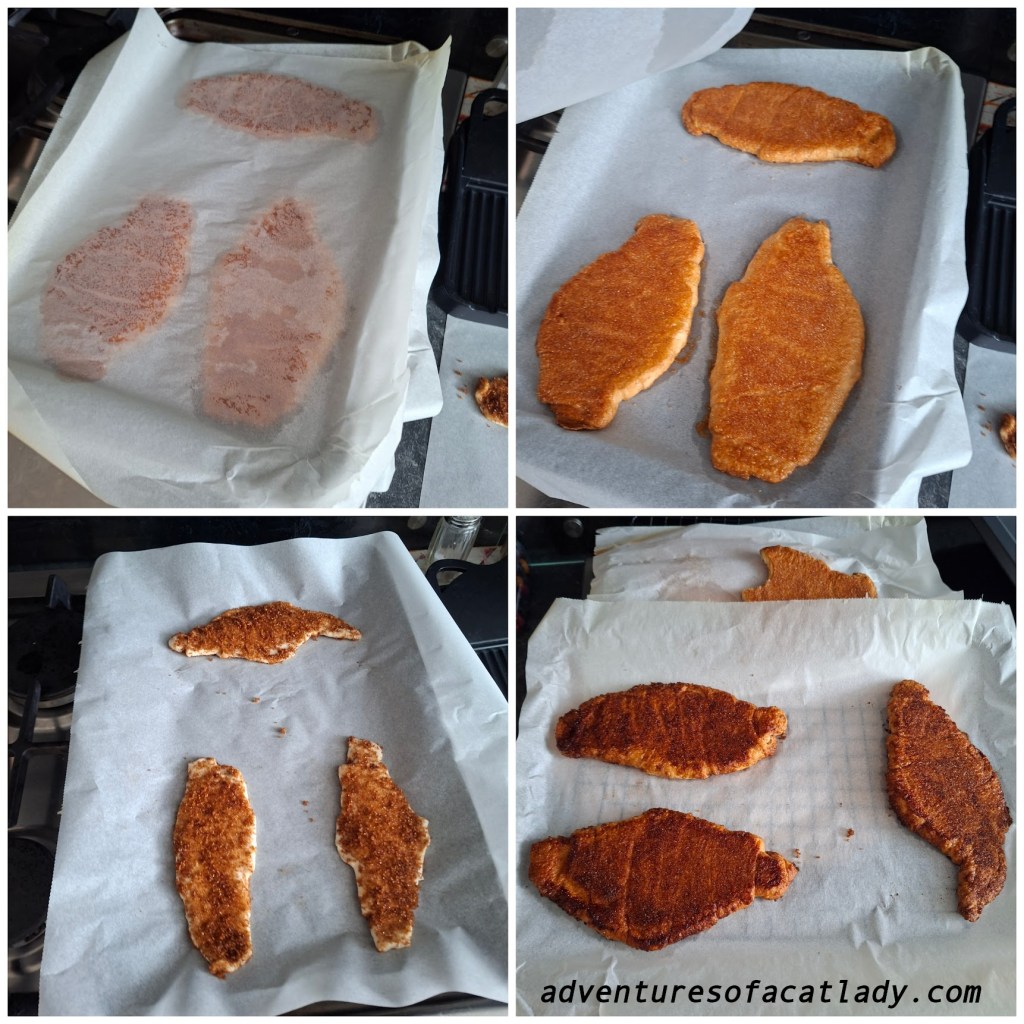
- Cover in sugar. (if using cinnamon, you can mix it into the sugar) I took a small dish, which was wider than the flattened croissant, put in the sugar, put in the croissant, pressed it into the sugar, turned the croissant over and repeated. I did attempt to shake/wipe off excess sugar but you do do. Put it onto a lined pan. Repeat for another 2 croissants, as no matter how big your pans are, don’t put more than 3 croissants to a pan. (refer to photo below step 6 to understand placement)
- This step is NOT to be missed. Get another sheet of parchment/baking paper and cover the croissants in the pan. Put another pan on top of the parchment/baking paper (lower right picture). This ensures that your croissants stay flattened during the baking process.

5. As per step one, bake according to the times on the can. Normally this somewhere between 12-16 minutes, depending on the manufacturer.
6. After baking, allow your croissants to cool. Remove the top pan and top layer of parchment paper and cool. I placed mine on a wire rack, to allow me to use the pan to finish baking off the rest of the can of croissants.
Below you will see the difference between using light brown sugar (top right) and dark brown sugar (bottom right) after baking. The bottom left is after they were covered in dark brown sugar and put on the tray to be baked, so you can see that they do grow quite a bit during baking. The taste is different between the two but I liked it and will use the two different sugars again.
Now for toppings! I would say this is the best bit but honestly, even at this stage the croissants are quite tasty. (You’ll notice a bite taken out of the top croissant at the top of bottom right photo)
7. Melt your chocolate and drizzle over the croissants. If you have a bar of chocolate, you throw/place gently (unopened) into a microwave and turn it on for 30 seconds until its melted, giving it a good massage between each go. Cut off the tip/corner and drizzle. If you have this option, use it, its super easy and next to no clean up.
*Many bakeries that sell these, dip half of the croissant into chocolate. You can do this but for me it gives an unbalanced flavour, as each bite doesnt have the same taste but rather very different taste profiles.
8. Cover with the toppings of your choice. Allow the chocolate to dry or don’t (as you can see I was quite keen in the top right photo). Its better to let it dry, as the toppings will otherwise fall off.
You have now made the very delicious and addictive viral flat croissants. Enjoy!

Leave a comment