In the Netherlands, it was announced that from the 1st of December, masks are required to be worn in most places, grocery stores and anywhere ‘inside’, in short.
Masks are the latest thing that you literally can’t leave home without! I initially bought masks (I have more than I know what to do with) and then realised that the need to wear a mask really isn’t going away any time soon and disposable masks are just that. I decided to delve into the idea of making my own, washable and reusable. I initially made some in May but I made a ton of mistakes and they’ve all now been binned. I thought I’d share my hints and tips with those who also fancy building your stock of washable reusable masks or just trying it out to see how easy or difficult it is to make a mask. I have a sewing machine, which has made my life much easier but theres no reason why you cant make them at home with hand stitching. Ive now made over 20 and decided to give a few as gifts for Christmas this year.

I normally wear glasses and have ‘the fog’ whilst wearing a mask. I specifically searched out templates that claimed to fix this. I also bought additional accessories for masks to stop ‘the fog’. To date, Ive had limited success in stopping ‘the fog’. I think the honest answer is to either breath less heavy or not at all, admittedly using these templates and lowering my glasses a few centimetres does seem to help but it doesn’t solve the problem entirely.
I found 2 types of patterns that I wanted to try and it turns out that I prefer 1 pattern over the other.

Mask patterns/templates:
gigi Patterns and she has a youtube video which shows how to make the mask (you must fill in the silly form to download the template but you can enter fake details). The adult XL was the pattern that I used as the primary template for my masks. I found the Adult L not to be big enough, it literally made me question if I have a big fat head (I think the answer is yet but we just don’t admit these things out loud) and I also wanted a mask where I didn’t feel suffocated, personally the XL was a winner.
SeeKateSew is an incredibly similar pattern to gigi Patterns and the template provides clearer instructions on the mask folds and offers an option to include a filter pocket. I printed out this template to specifically know where I should make the mask folds, very helpful!
Nanay Express is a different pattern from the two above and I think it’s somewhat easier to work with, though some of the points I didn’t fully understand in the Youtube video. I liked that given the way the pattern is, its possible to use 4 different pieces of cloth if you wanted to and if you think about it, its possible to sew it in a way which allows for space for a filter at almost no extra time or effort (see below). However, I didn’t like the way it fits on my chin, to me it just looks weird and once I see it, I cant unsee the chin weirdness.
Here are a few things that I learnt in making my masks, please note that I only made masks for adults and can only comment on the patterns that I used.
- Always use 100% cotton fabric! The initial masks I made in May I used every kind of fabric I had from satin to velour to polyester, none of these were breathable, cute, felt great on my face but holy crap did I struggle to breath in them.
- Prewash your fabric and iron it in advance of using it.
- For the elastic to go around your ears, I tried 3 different lengths (24, 27 and 30cms) and I found that 30cms/1ft worked the best and I ended up using 30cm for all of my masks. This also didn’t give me the feeling of having the mask so tight on my face that I just wanted to take it off.For
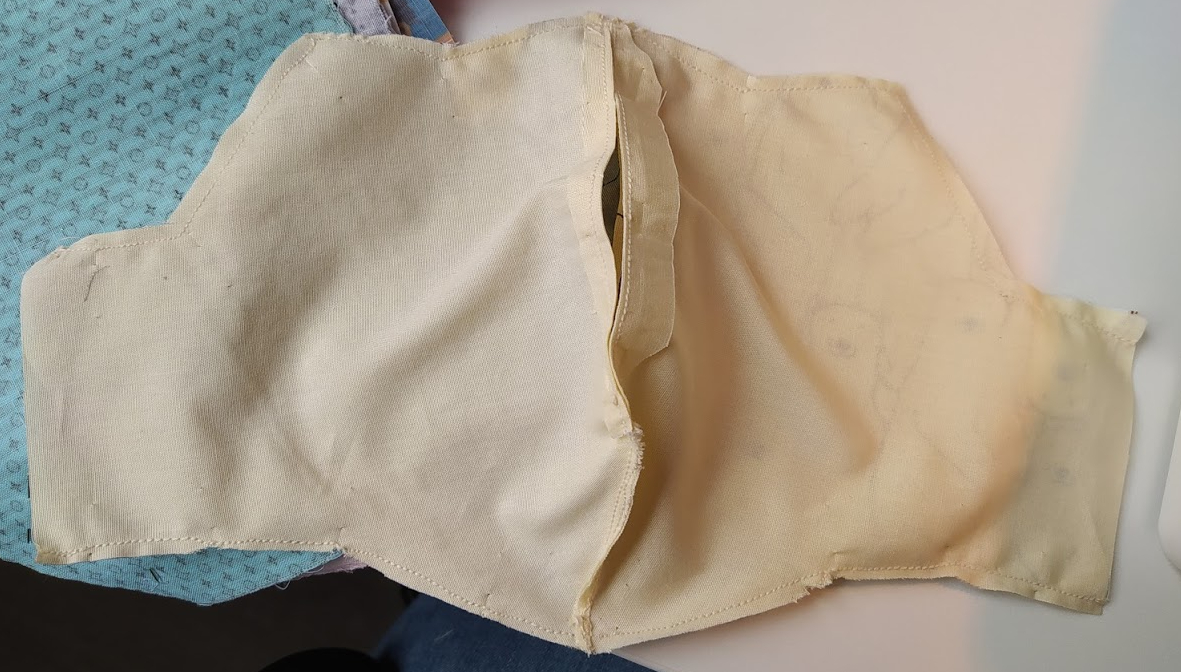
- For the gigi pattern, I learnt to cut off sections on the side before you fold it over to sew for the canal that is for the elastic (I also only fold it once rather than twice). With less fabric it wasn’t as difficult sew, less layers to go threw. It also is less pressure on the side of the face from fewer layers of fabric when you’re wearing it. As per the photos below, after I stitched the the folds, I went back the cut up to about 1cm away from the line and then folded this over once and stitched it for the canal for the elastic.
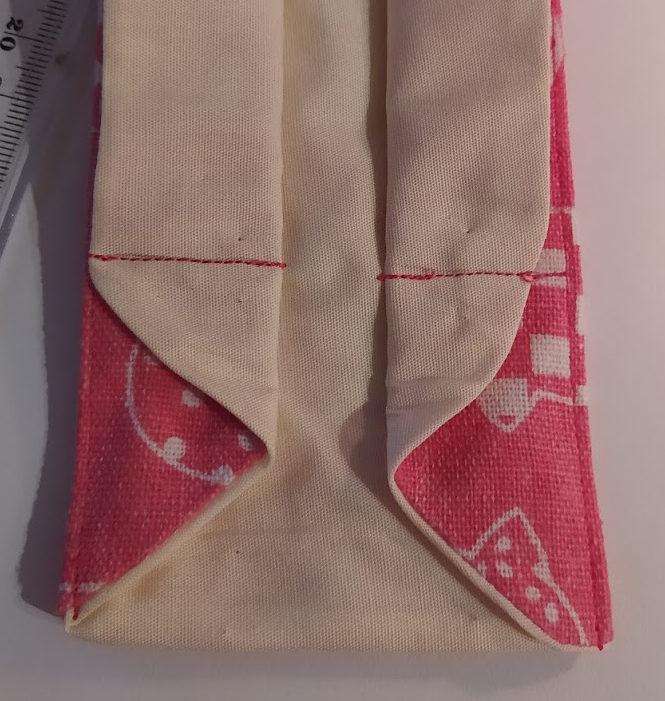
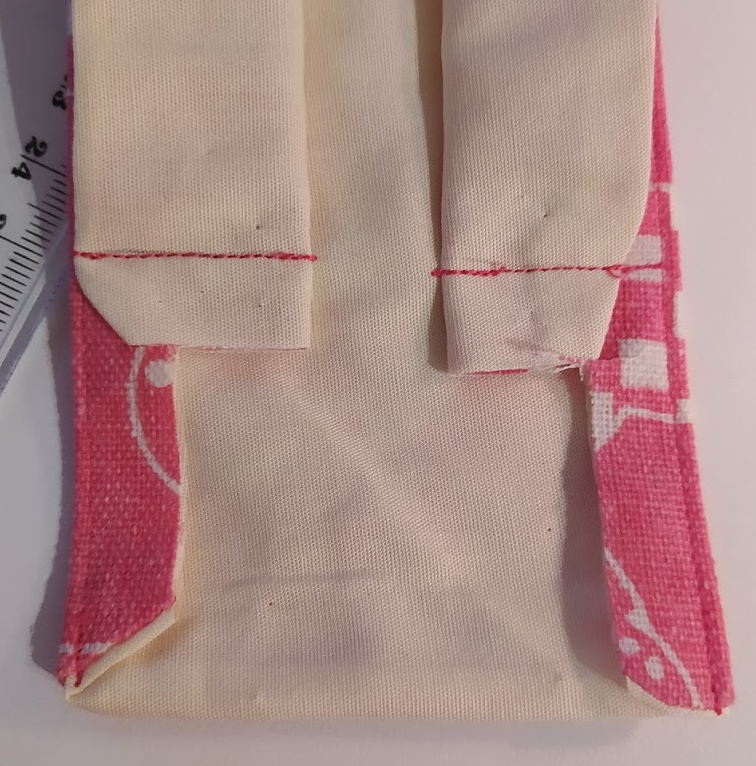
- For the stitches above, I realised it much easier if I get out my pencil and a ruler to ensure that the lines are straight! The first few masks I made, no straight/aligned lines, it gave a new meaning to wonky and I’m beyond crap at eyeballing and thinking its a straight line!
- Use fun fabrics! Seriously life is too short to use boring or plain fabric! Have fun with it! I found some cute fabrics and have never looked back!
Creating a filter section for the Nanay Express pattern. I decided to have fun with it and user multiple different types of fabric and create an area for a filter to be added without adding another layer of fabric.
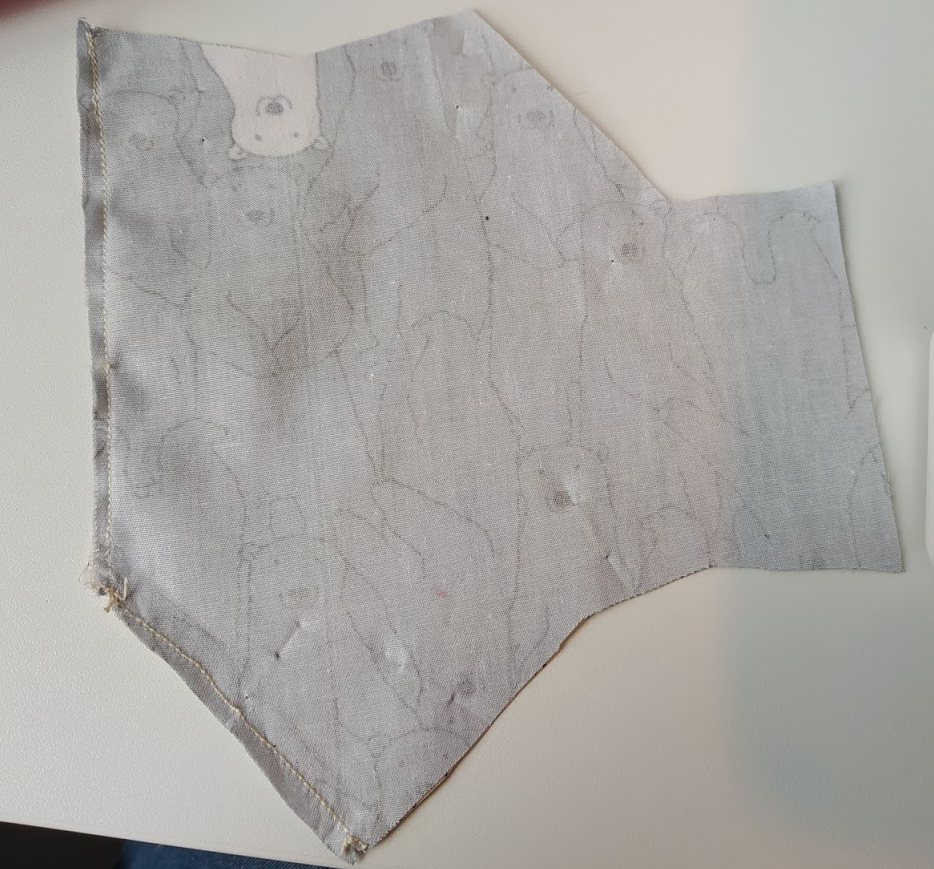
I used 3 different fabrics, 2 for the outside of the mask and 1 for the liner. I cut them out as per the template. I have a bit of extra fabric for the edge of liner, so that I sew a clean edge, as per the yellow fabric.

I then sewed a straight line down the the front and bottom.

Now onto the liner, I completely made it up as I went as to what I should do. I created clean edged on both pieces of fabric and then sewed down the bottom of the pieces of connect them.
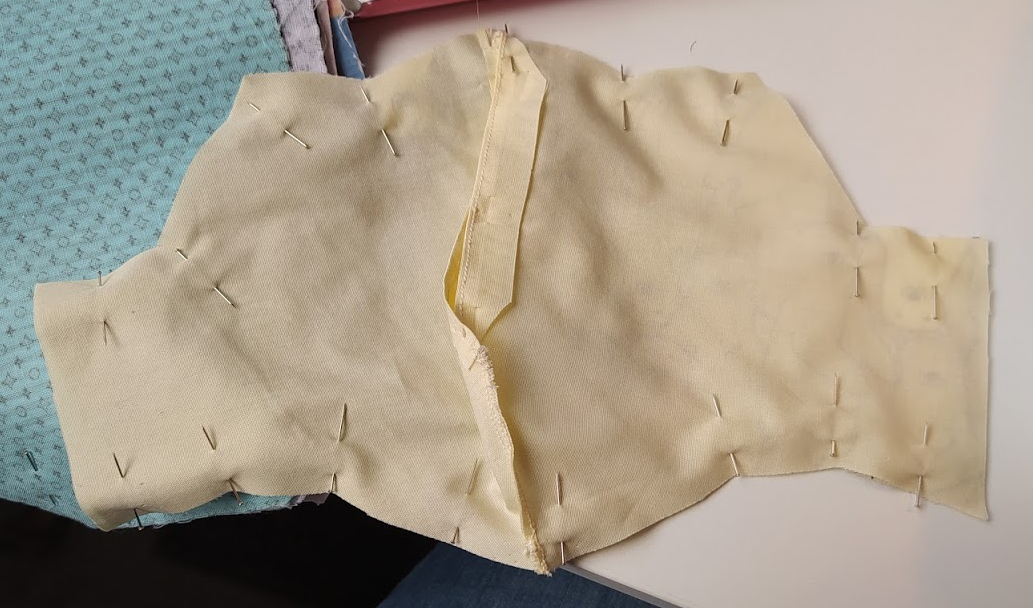
I then pinned to the fabrics together inside out to few them together, it was at this point that I realised that the hole for the filter could have been much smaller, oh well!

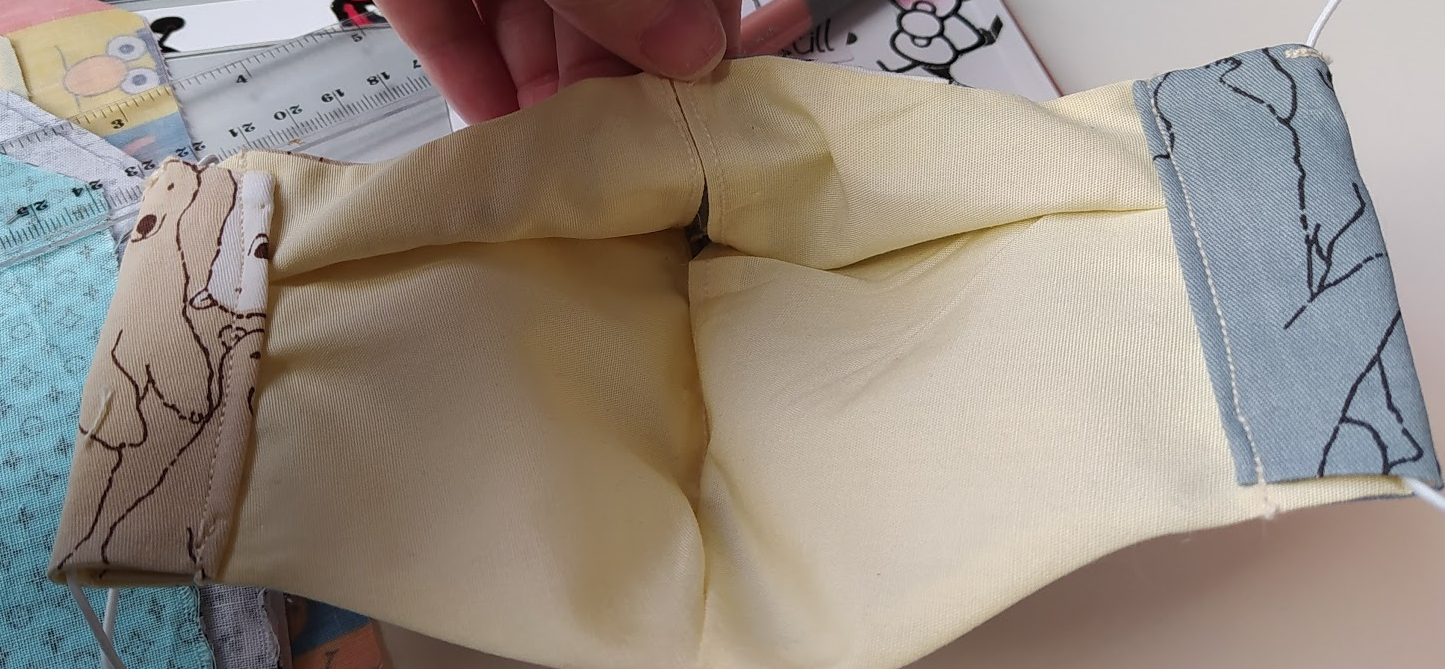
The finished mask with the 2 fabrics front he front. The inside of the mask, as you can see where it folds over to cover the nose, could have been one piece rather than open for a filter, as this areas doesn’t need a filter.
Tags: As I am giving masks as gifts, I wanted to give them with some sort of tag and care instructions. I came across two that I really liked!
Savlabot handmade crafts have a selection of labels and tags for masks that I really liked and have printed off.
The Birch Cottage has some really cute care instructions that I printed off (and slightly altered).

The above is using the gigi pattern Adult XL, it fits, no weird chin, its not too tight and the fabric makes it a fun mask!
Where I purchase my fabric from in the Netherlands Budget Stoffen, Stoffen en Zo and Ali Express (for my fun fabrics but it does take over a month to arrive).
I hope you find these tips useful and remember to share with friends! 

Leave a comment