Mental health is something that affects everyone. Despite this, its still considered a taboo subject, which does no one any good. Although it could be argued that the world is currently taking many steps backwards and actively towards the later 1930s or early 1940’s…

It is highly likely that you have had the ‘doorway effect‘. which in short, is when you walk into a room and you forget why you walked into the room. There have been studies behind this and its a very real thing. This is me 100 times over. I consider myself a real life Dory (from Finding Nemo), I am incredibly forgetful. I regularly ask myself, ‘What am I doing?’ and frequently respond to myself, ‘I have no idea’. I regularly go to do things around my house and get side tracked (doorway effect in addition to my Doryness) and think to myself later ‘I’m sure I was doing something…’. Its helpful that I have whiteboards around my house and put general reminders in my phone.
Im a very visual person. My house is very quirky in that way, that I have all kinds of visual things around it. From photos, to collages to metal signs, posters and even small sticker quotes around the house. I think it could easily be said that my home is very ‘me’, ie quirky AF.
I’ve been going through a rather creative period (the tie skirts and a few other things) and I’ve decided run with it, whilst it lasts. It keeps me busy, thinking, somewhat out of trouble and most importantly focused. I came up with the idea of creating a collage of pictures for positivity / mental health, a bit of both. I liked the idea of walking past something that is in short ‘good vibes’, although having written that out makes me want to vom a little in my mouth. Let me rephrase this, I like the idea of having a visual reminder to be less hard on myself.
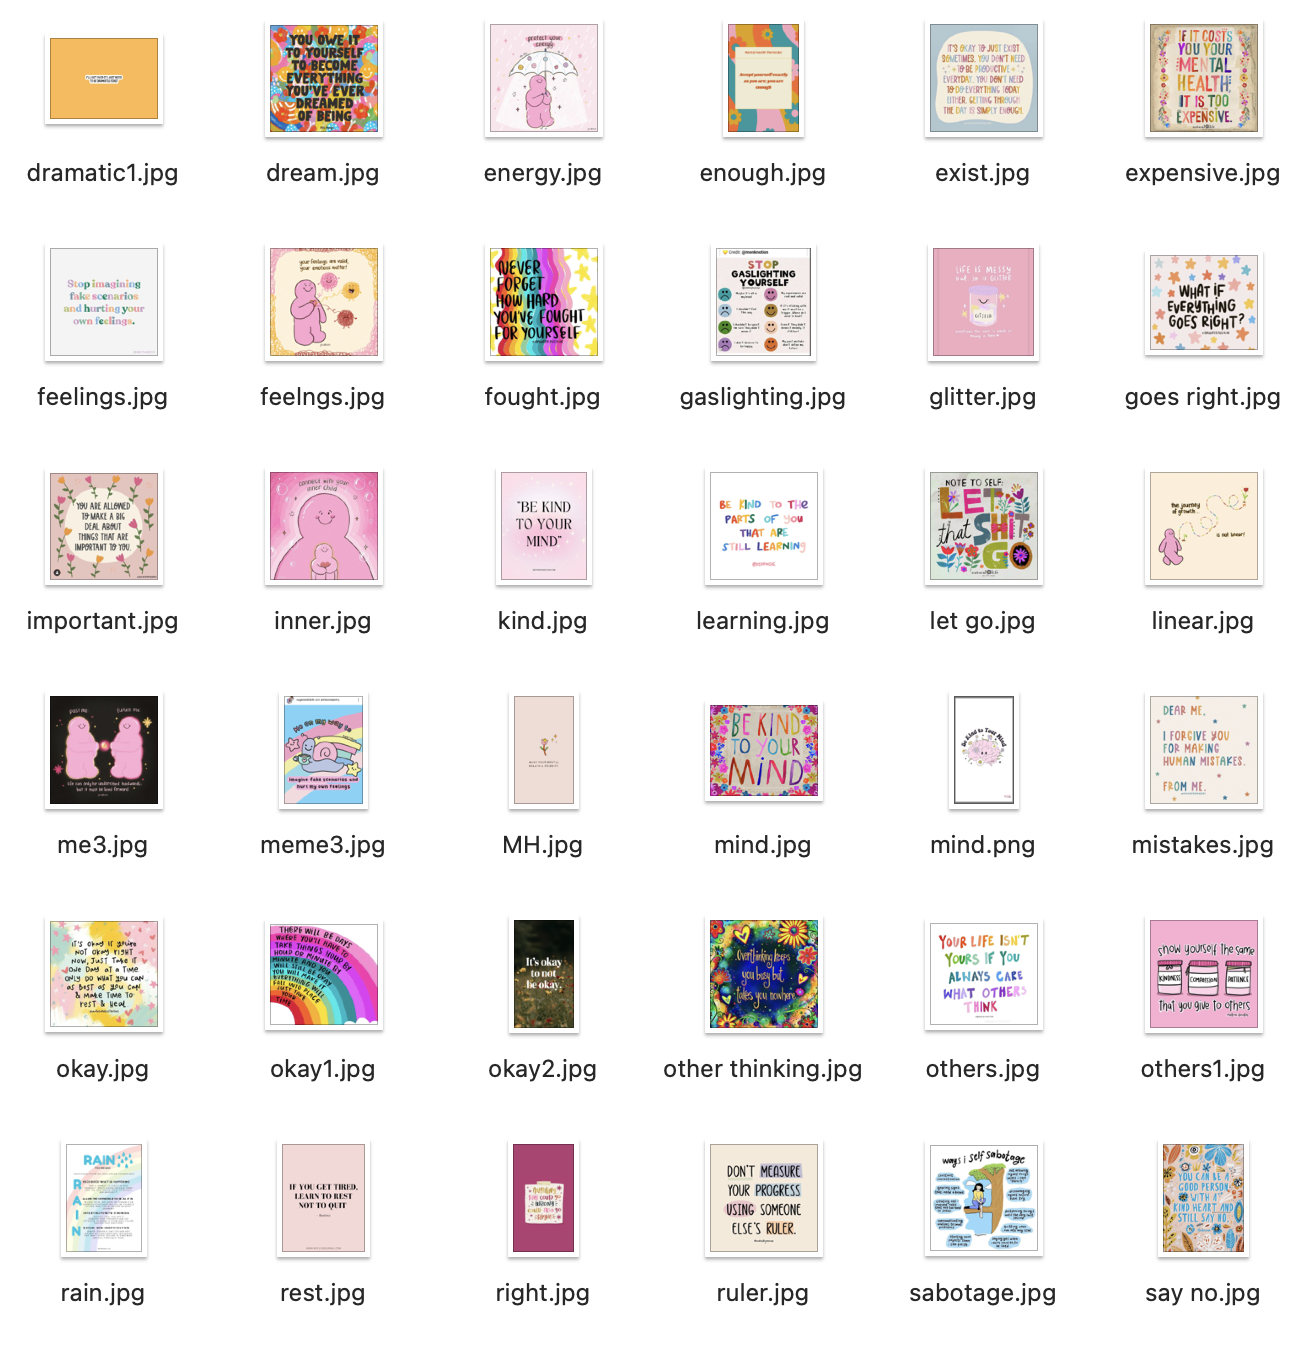
I was on the ole Pinterest, as I regularly am for recipes and fell down the rabbit hole of finding positivity / mental health pictures. I found a substantial amount of pictures that I liked and saved them all, from serious to funny pictures. I then decided to cull the collection that I had by deciding if it was applicable to me or if I just thought it was useful/funny/nice idea. My starting point was roughly 30 pictures. I then used an online photo printer to print them off, including cropping and choosing the size I wanted, I opted for three sizes.
Below is a picture that I saw and immediately was like ‘thats me’ and then all a small portion of the other photos that I saved.

Step 1: Find the photos that you like and mean something to you. Choose your source of printing them (using your own printer or an online service). You can also print more than you need, to swap them out later.
Location, location, location. I already had an idea of where I would put the pictures. My home is mostly white and I enjoy have small pops of colour here and there, nothing exceptional, of course. Measure the area, so that you know what size frame to get or what you have to work with.
Step 2: Decide where you will create your wall / put your pictures.
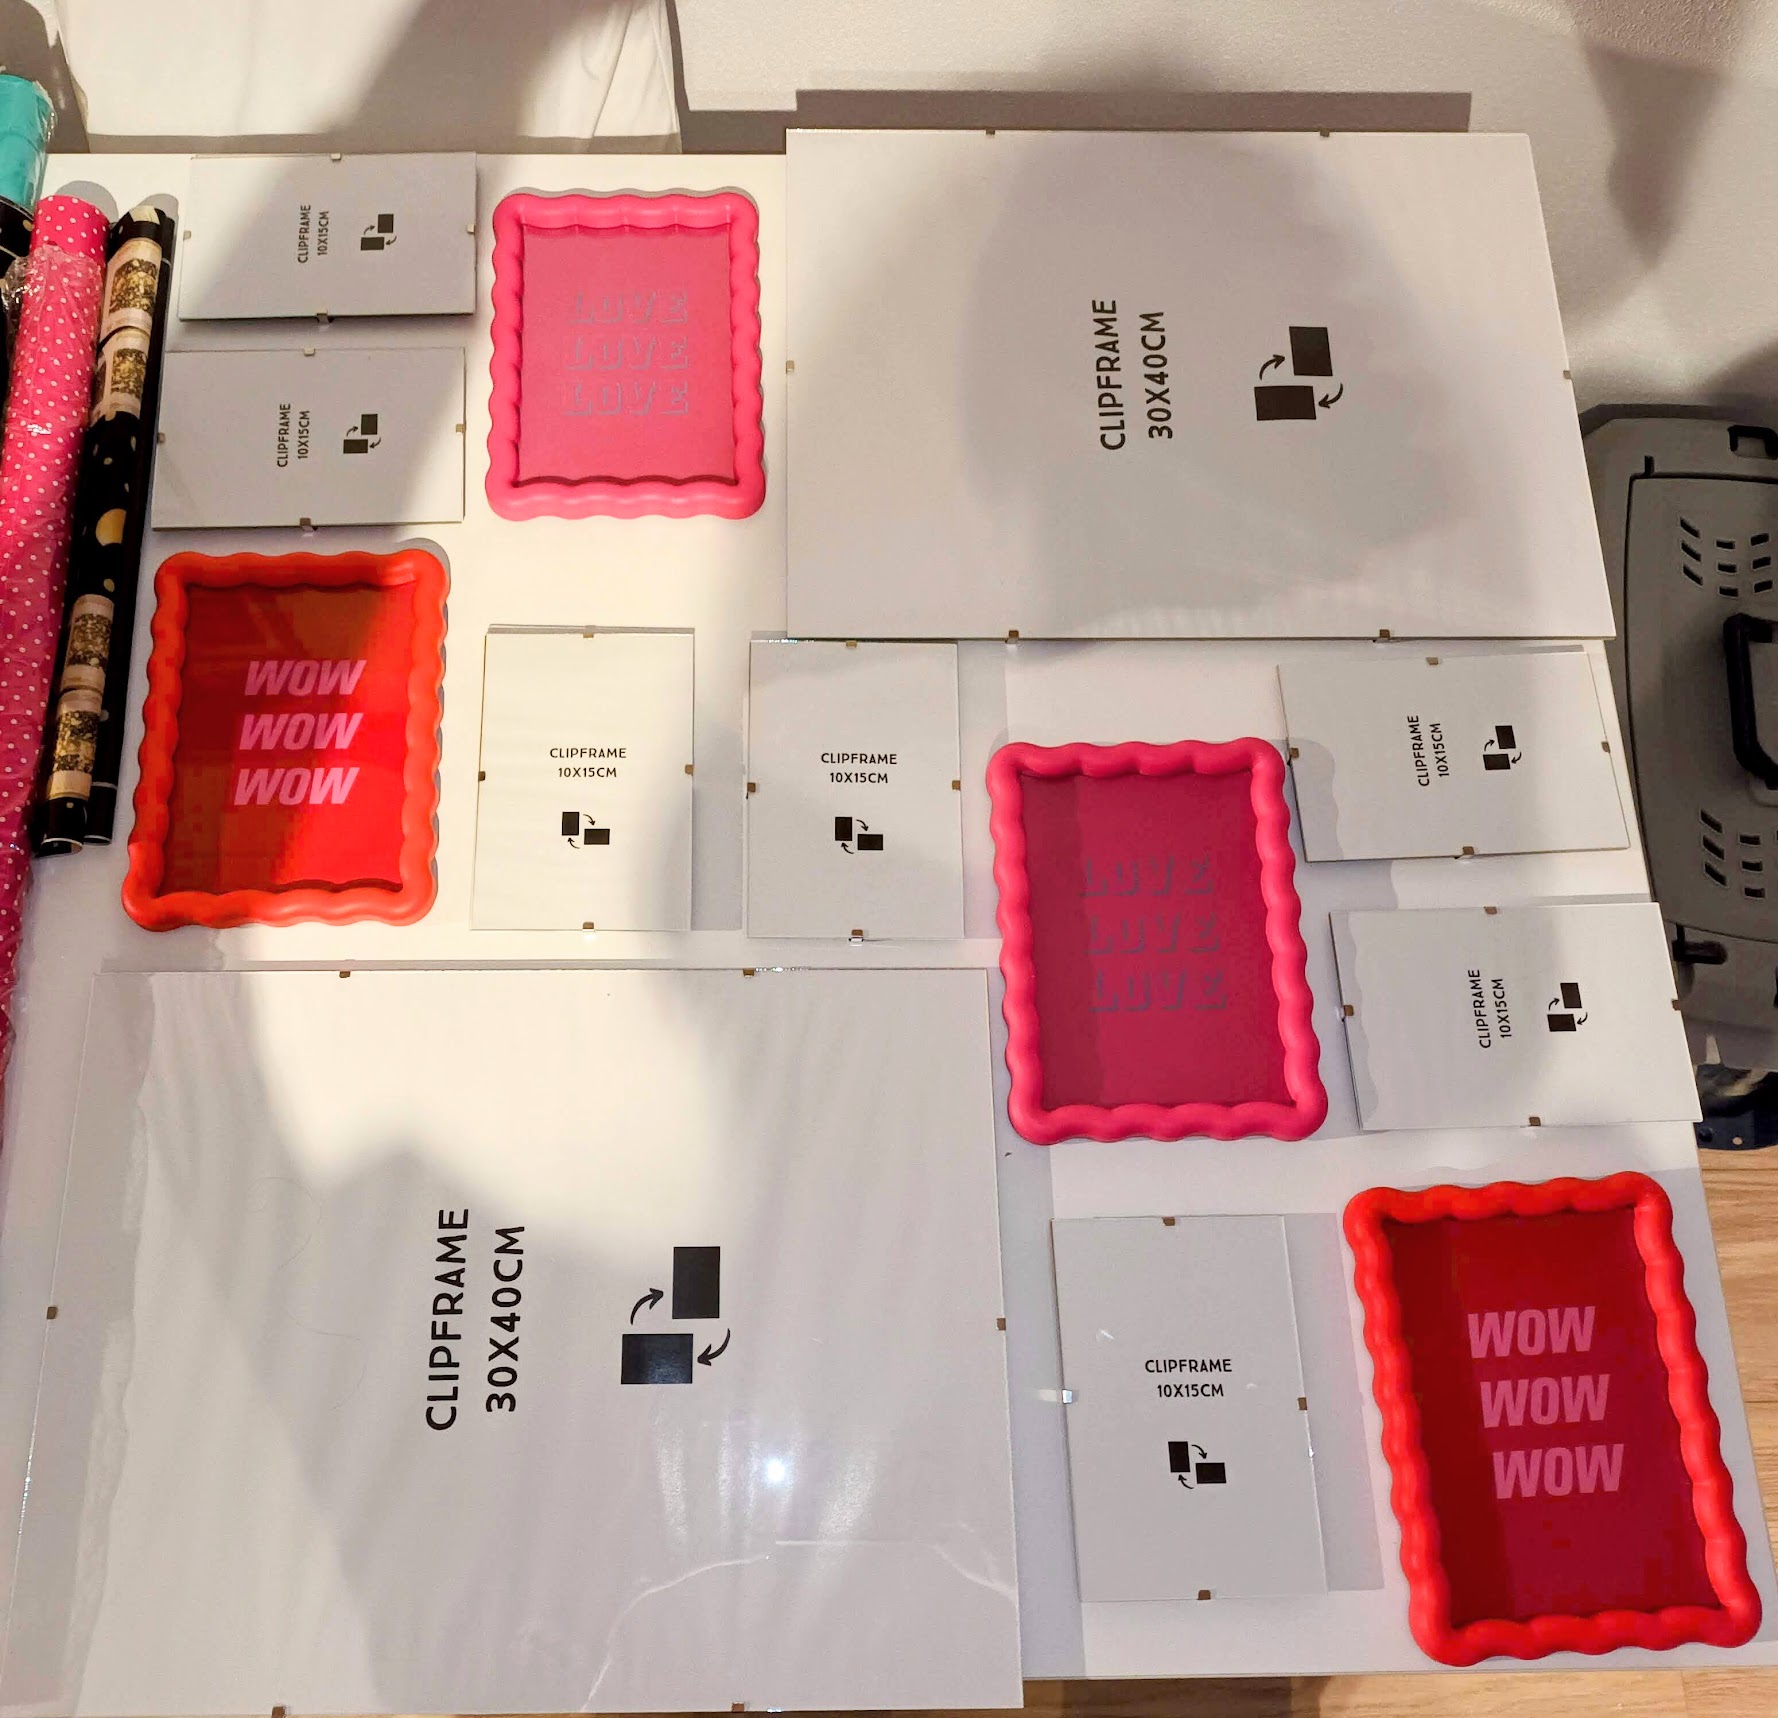
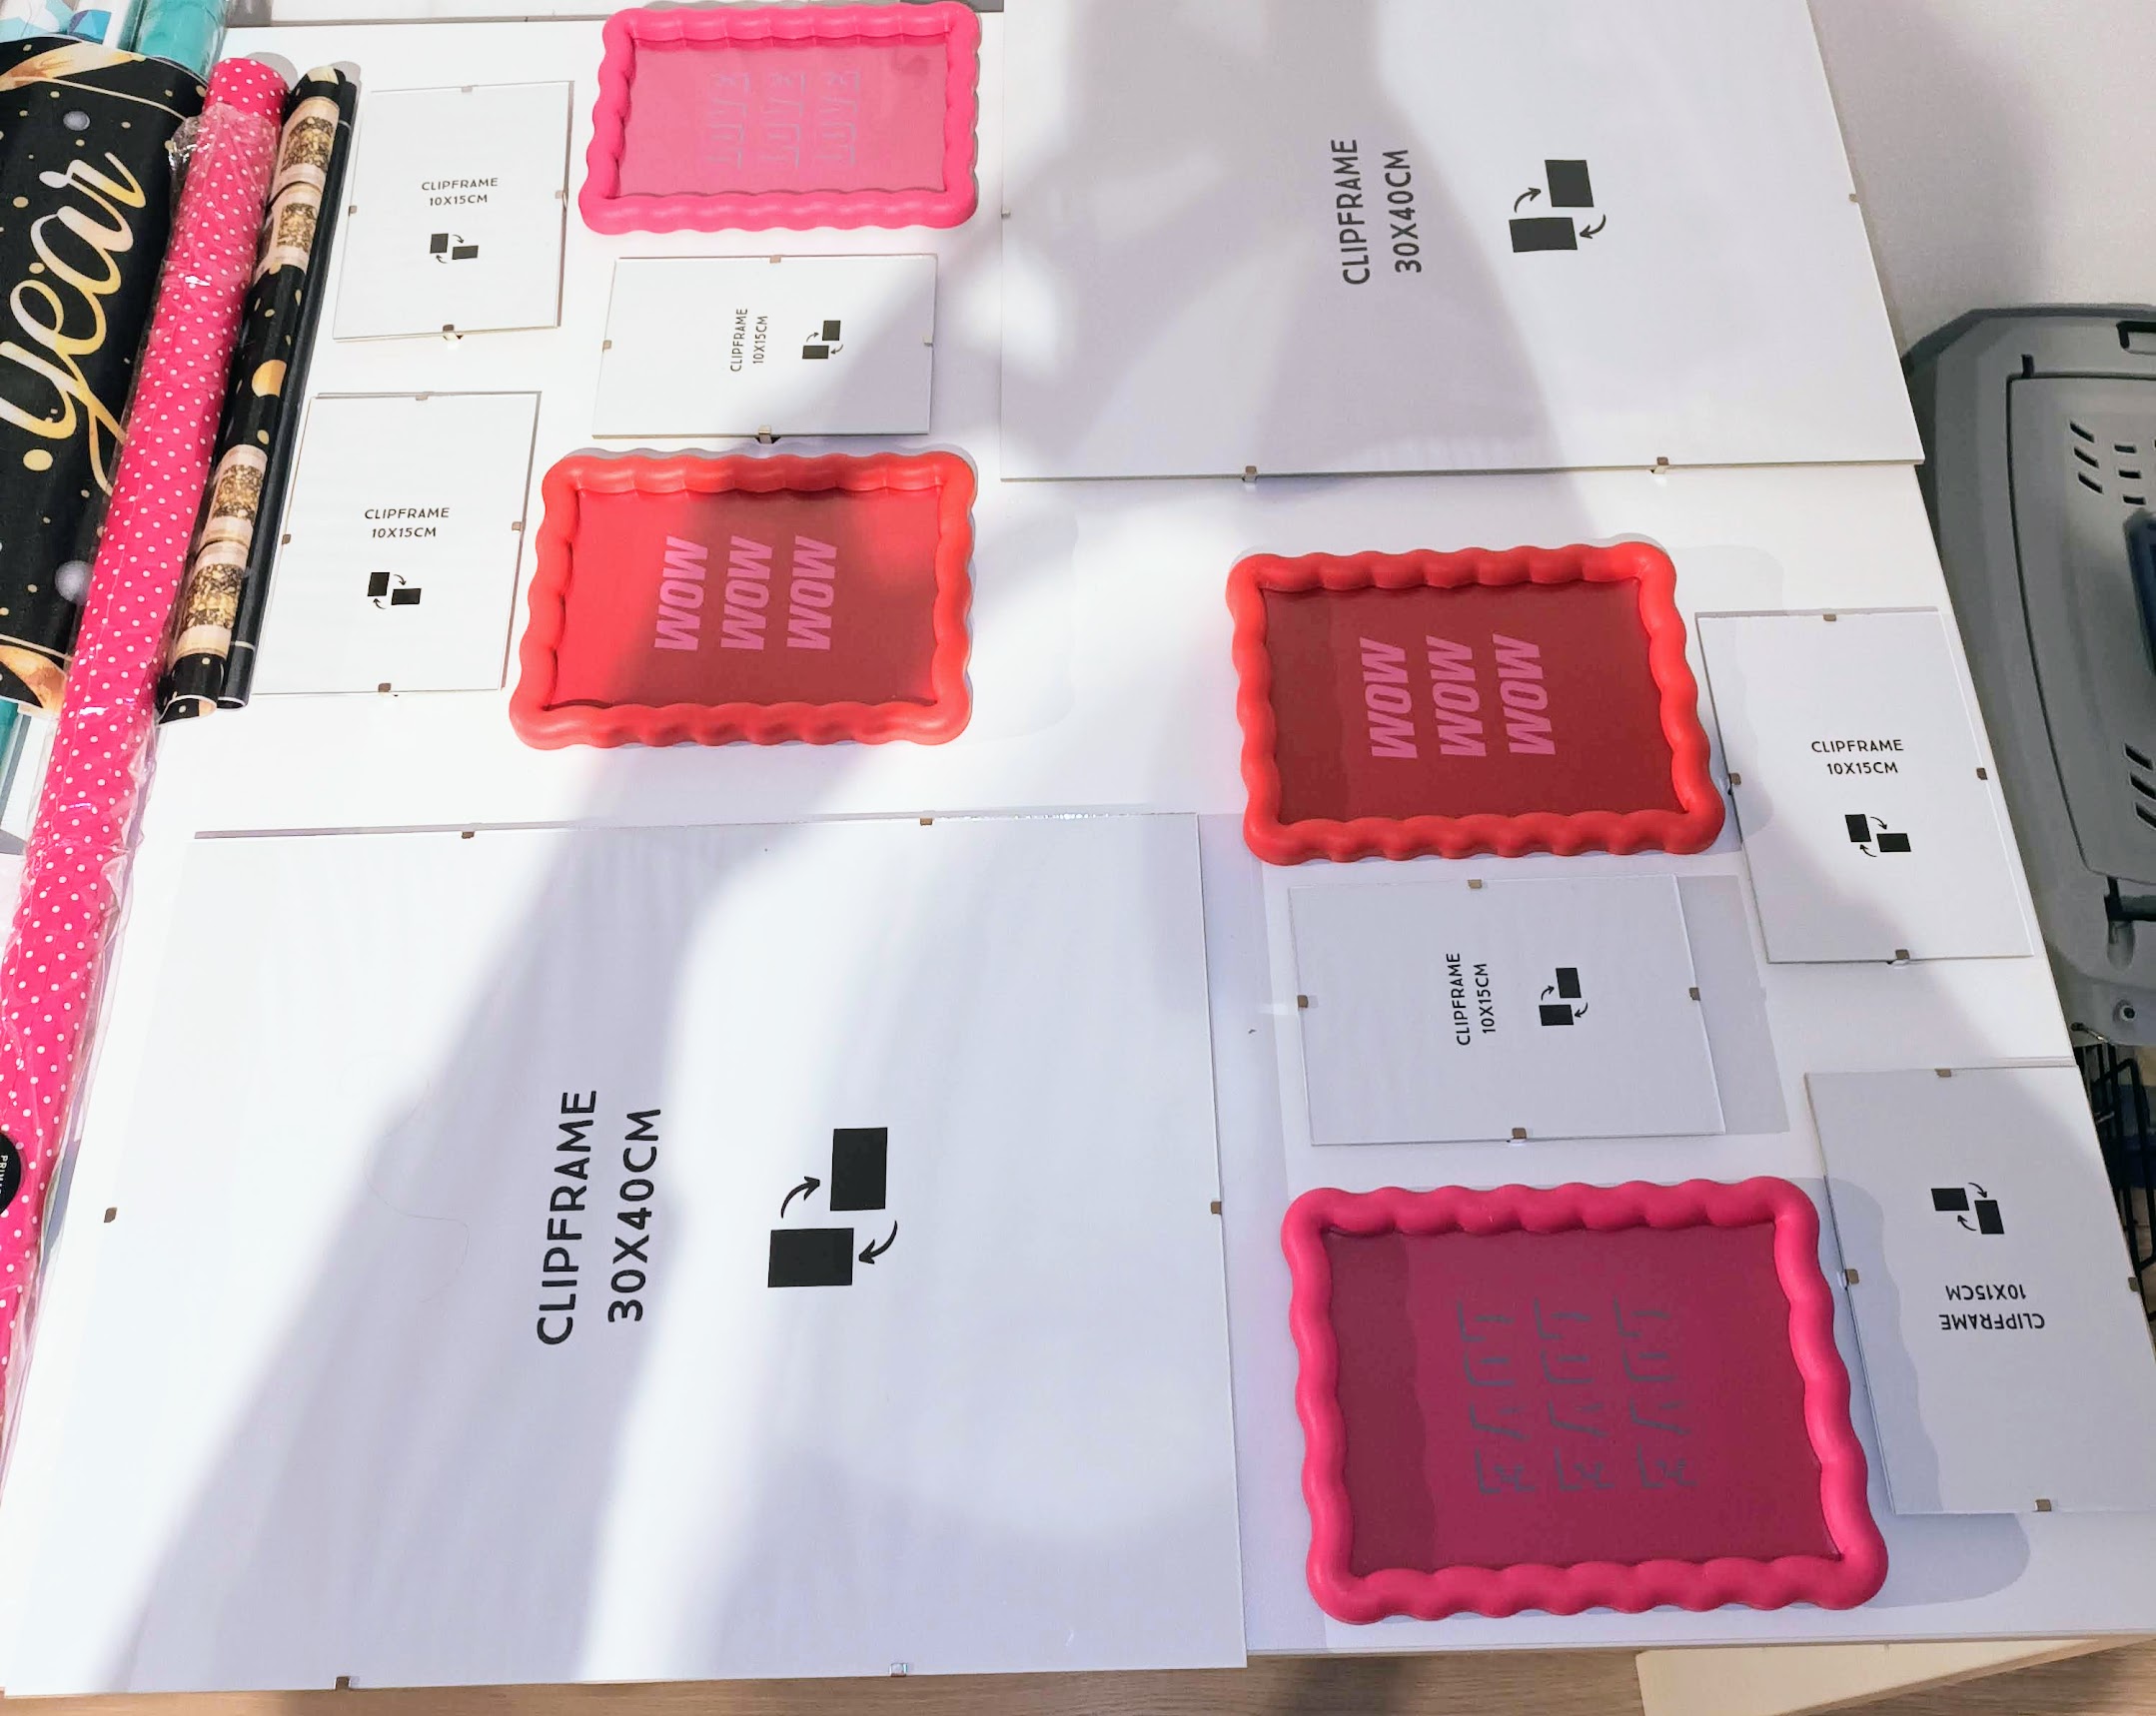
Frames. I wanted to use a large plexiglas frame that I have used for multiple other collages in my home. However, all of my old frames were previously purchased in the UK. Despite multiple searches I was unable to find what I was looking for (insert much swearing). Plan B was then formed… Buy multiple smaller frames and then figure out on when they are delivered. I did just this, getting 13 of different sizes, shapes and colours.
Also consider if you want backing in your frames. I normally use wrapping paper in colours that I like, to add a pop of colour to the background.
Step 3: Frames. Decide what type(s) of frames you want to use. One large frame with tons of pictures or multiple small frames. Consider if you want a backing colour in the frames.
Now to decide how the pictures and frames will go on the wall. Measure the space you want to put the photos in and measure this out on a table or a large flat space (floor) and try out different ideas. I initially forgot that I needed to leave space for the light switch. I took photos of each ‘design’, so that I wouldn’t forget. I also choose spotty pink and turquoise wrapping paper for my background colours.
Step 4: Find a large surface and try different arrangements of your frames, until you come up with something you like.

Now from all of your pictures, decide how you want them displayed and in what frame. I tried to break up colours or too much of the same theme in the same area. I also decided how I wanted to use my wrapping paper as background colour. I choose turquoise for the large frames and then the spotty pink for the smaller frames.
Step 5: Pick which photo goes into which frames and insert background colour, where needed/used.
Get a hammer and for me it was a ton of nails and go wild. This isn’t entirely true at all. I measured everything out, quite precisely, including space between each frame, distance from the top of the frame to the nail holder. And despite being my OCD, mine wasll still wasn’t perfect but I’m choosing to ignore that until I cant anymore (if you know, you know).
Step 6: You should now have a finished wall that you kind of love or atleast like, if nothing else. I absolutely LOVE my wall. Honestly since having put it up, I realised its the visual thing that I was missing. I also have loads of pictures to swap out which whats on the wall, should I bored or feel a new message is needed.

Now you can too, make epic shit in the form of a positive/mental health wall!

Leave a comment