I love a good granola bar but I really dont love having to pay around the €2 mark for one that looks unappealing and tastes like cardboard. I use to bulk buy them from Costco (being honest, I shipped over with me around 60 Protein Natures Valley bars but Im kind of over them) but I dont have the option to buy more once they are gone and theres a sense of accomplishment in being able to make your own. This is my go to recipe, that Ive made successfully (yah!) and not so successfully (damn you oven, burning my oats rather than roasting them – ok maybe I got carried away multi tasking and forgot them).
This recipes makes super thick bars, which are VERY yummy. It also requires a lot of prep work but is well worth it and the best thing about this recipe? You can change it to suit your taste, as per the notes at the bottom. Take out ingredients that you dont like (or don’t have in the cupboard) and add in things that you do love (or have in your cupboard). You can take out of the chocolate (remember that life is SO much better with chocolate) or you can drizzle melted white and milk chocolate over the top (refer to previous statement). If you dont fancy feeding your neighbour, cut the recipe in half or if you want to feed your colleagues, local school and fellow passengers on your flight, double the recipe!
These are technically roasted no bake granola bars, all of which will become clear below.
No Bake Granola Bars
Makes: 20+ bars (makes 9X13 pan) Prep time: 15 mins Make time: 10 mins Total time: 25 mins
Required Ingredients:
- 4 cups (360g) old fashioned oats
- 2 C (50g) rice crispy cereal
- 1/2 C (50g) shredded coconut
- 1/2 C (125g) butter
- 1/2 C (170g) honey
- 1 C (200g) brown sugar
- 1 tsp salt
- 1 tsp vanilla
- 1 C (120g) dried cranberries
- 1 C (150g) raisins
- 1 C (190g) dried mango
- 1 C (190g) dried apricots
- 2 C (350g) semi sweet chocolate
- Wax / Baking paper
Now to be converted to these home made granola bars!
1. Take your oats and roast them in the oven for roughly 15 mins at 180C/350F, turning them every 5 mins. Simply pour them into a pan/cookie sheet (dont grease the pan) and let them do their roasting thing. (Instant oats is seriously not a thing in Europe and as is a specific no bake recipe, you really dont want crunchy oats – tried, tested and was NOT a win). After 5 mins, you will notice the edges starting to brown and the smell of oats. Start to turn the oats, pulling them in from the edges and putting them to the middle. Remember to keep an eye on them and not to let them burn.


2. Whilst your oats are toasting, dice up your fruit and set to the side.


3. Once oats have cooled, in a large mixing bowl, mix together the oats, cereal and coconut.
4. In a saucepan melt the honey, butter, brown sugar, and salt together. Stir together then leave it alone as it comes to a boil. Once the boil has reached all the way around the edges of the pan, begin timing. Allow this mixture to boil for a minimum of 2 minutes and 15 seconds. During this time, you will most likely need to turn the heat down, so it doesn’t overflow, but be sure it keeps boiling. In short, let the mixture boil no less than 2 mins 15 seconds but its ok if you boil it longer, I normally do, try to avoid it boiling for longer than 5 mins.


5. Whilst your honey butter mixture is boiling, melt your chocolate, I blast it in the microwave 30 secs a go, stirring in between blasts until you can stir is smooth. Take your pan, put a layer of wax paper in it (or baking paper as its called in the UK), then put the melted chocolate in the bottom of the pan. You dont have to use chocolate in this recipe at all, however, I find it a good ‘glue’ to help hold the bars together. Smooth over the chocolate to an even layer in the pan.


6. Remove your honey butter mixture from the heat and stir in the vanilla. Pour the mixture over the oats, using a rubber spatula to get all the sugar mixture out of the pan. Mix the ingredients together until the oats are completely coated. Add in the chopped fruit and mix well, to ensure honey butter mixture coats all.


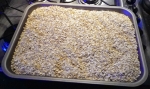
7. Pour the mixture and press very firmly into your pan.


8. Now for my stoke of genius (doesn’t happen often but this was a good one!). Cover the top of the bars with another layer of wax paper and use a can/tin of something (I used beans) and press down the mixture. I went over the pan about 5 or 6 times, ensuring to go over the entire size of the pan. This gives the pressure required to ensure that the bars dont fall apart when you go to eat them. You’ll need to press down the edges of the pan with your fingers, as the roundness of the can/tin means that it doesn’t go right up to the corners. You will visibly be able to see the the mixtures has been presses down more than just with your hands.


9. Place them in the fridge for 2 hours then cut to size. I tend to leave mine in the fridge for a couple of hours, because I have other things going on and like the idea of leaving things and dealing with them later. If you dont use chocolate on the bottom, leave them in the fridge 30 mins instead, as the chocolate will not need to set up.


*Notes: you can mix and match this recipe and the ‘add ons’ as much as you like, you will always need the honey butter mixture (not to be altered) but you here are a few things you can add in or change out to make this recipe EVEN better: 1 teaspoon cinnamon, 1/2 tsp ginger or nutmeg, peanut butter chips, chocolate chips, 1 cup of American peanut butter to the honey butter mixture, 1 cup diced maraschino cherry, or candied peel.
* For a extra touch toast off your coconut for added flavour!
*Should your granola bars fall apart (this has happened to me), dont throw it away but use it as cereal instead, a yummy breakfast treat.
Remember to share with friends and enjoy! 🙂

Leave a comment